I’m Jonno, a Sÿenann player of no great experience, but I did win 4 out of 5 games at this year’s Interplanetario, placing 5th out of 28 (read my first game report here). Here are my 100% entirely correct thoughts on how to play Warcrow, but take my advice with as much salt and other seasoning as you like.
What is Warcrow about?
The core question Warcrow asks you to solve is: Can you get your units in the right positions to score, and keep your opponent’s units out of those positions?
Activations let you move your units to get in position, stress controls how many times you can activate, as well as determining combat effectiveness. Combat effectiveness is essential in controlling unit positioning, especially the position of still being on the table at all. You could argue that activation management is more important than stress, but I’m writing the article and you’re reading it, so who knows what you think.
Positioning
Positioning doesn’t only mean exactly where a unit is, but where it is in relation to all the other relevant units. A troop of Ice Archers on the central objective by itself is in a good position, the same unit in the same spot within range of being charged by enemy cavalry is not.
Generally, I would consider the best position to be:
– controlling an objective
– threatening an enemy via charge or ranged attacks
– out of threat range of charge or ranged attacks
– within threat range of a supporting unit
This means if an enemy comes to contest the objective they have to move without charging, letting you charge then first, which with shove may mean they can no longer reach the objective even if they disengage, and if they stay around your second unit can countercharge or shoot. Warcrow shares a lot of positioning dynamics with chess – if you can, it’s vital to protect your pieces with other pieces, creating a chain of danger that prevents your opponent attacking any single unit without sacrifice. This is part of why ambushing units so good, they are threatening and protecting every piece simultaneously, until they are committed. Efficiently moving your units into positions that have all the above traits is key, and something I try to do with every activation. If you are ever unsure as to which move to make, have a look at which of your units can get into a position like above and just do that without worrying about being clever or planning ahead.
The point about countercharges gets often overlooked I think – no one likes having their units get damaged, but sometimes it’s worth letting your opponent charge first so you can countercharge with another unit. Free movement via charge is gold, and ganging up on enemies is gold (you negate a symbol on defence AND attack). Most units in the game can’t handle two enemies at once, so sometimes it worth not moving so far ahead that your units can’t protect each other. A unit of Bucklermen within charge range of Black Angels is much scarier to attack than one with no friends around, even if that means slowing down your advance a bit.

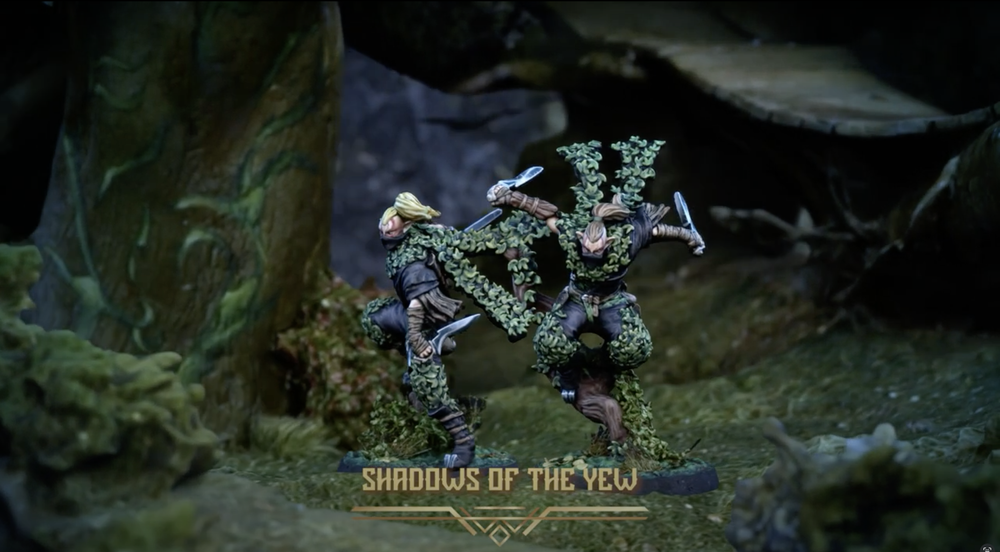
They will charge you, and they will look fantastic doing it
Whenever you can, you want to get free movement. The most relevant free moves I think of are from charging/assaulting and from killing a unit entirely. If you can, you want your opponent to spend activations moving, and you spend activations charging. For instance, a unit of Hunters moving to be within charge range of an objective are already threatening it, they don’t necessarily need to move up right now and flip the objective, you can wait until your opponent moves onto it and then charge them later. If they choose not to claim it, no worries, focus your attention elsewhere.
Melee combat lets you move enemy units out of good positions, directly through killing and the shove mechanic, and indirectly through the threat of violence. Often this threat is more effective than the actual attack – sometimes your dice are cold and the attack does nothing, but the threat of the attack can hold a flank without any action at all. This is a key part of why units with a long-range charge like Warg Riders or Black Angels are so good – they have an enormous threat range without having to actually commit to combat. Keeping this threat open by not overstressing or engaging your unit is important, if you activate too often or early, your opponent may find an alternative path that can bypass your threat entirely.
Stress
This brings us to arguably your most valuable resource in Warcrow: stress. Stress determines how many times you can activate a single unit in a round, which decides how far it can move and how many times it can attack, and how effective those attacks are. Winning melee combats gives stress, and being engaged prevents the Rest action, which clears all stress. This means there is always a delicate balance around how much you push a unit per round – if you are close to max stress, your opponent might just charge to disable you, even if they don’t hope to kill you.

Effective ways to win Warcrow, apparently
Stressing to add combat modifiers in attack and defence can be an enormous boost that can be the difference between a unit being wiped out and overrun or holding the line to win the game. It is easy to try to calculate how many times you want to activate a unit in a round but then forget how many times you want to stress for combat. The Shadows of the Yew with an attached Lioslaith want to double stress each attack for ridiculous amounts of damage, but then they are already at max stress on their second activation with no more combat bonuses! Planning ahead and keeping a conservative stress buffer is key to being able to withstand surprise attacks or finding spontaneous opportunities for a unit to be activated again.
I am always looking for ways to help my opponent to mismanage their stress. I want to lock out their key pieces safely and efficiently, which usually means getting them into poor positions and stressing them out. This might mean moving a unit into a vulnerable-looking-but-useful position and letting your opponent advance towards it, before simply running that unit away, or bringing a support unit to present a countercharge threat, or by presenting a new problem elsewhere that more urgently needs to be solved so your opponent doesn’t have the time to punish your overreach. You want to encourage your opponent to waste activations and stress on things that don’t matter to winning the game – my most common example is letting my Druid get charged in round two or three – yes he will die, but did killing him actually help my opponent win? You didn’t like that my Shadows assassinated Drago, and now you want revenge? Good luck spending two or three activations to finally kill them while I take the other objectives. Attacking an enemy so they stress on the defence is also often quite efficient, if you win the combat they will be two stress higher, which often enough to take them out of the round.
A common and stylish reason to flip the table
Let’s look at a frequent problem from my point of view as a Sÿenann player – Aggressors with a War Surgeon strutting down mainstreet to claim the middle objective like they own the place. Hopefully the terrain setup means that they need to activate twice to get to the middle objective – either by moving, or, if you let them, by charging or assaulting your midfield unit. If you let them attack you, your units will get moved into a bad position, such as being in several pieces scattered over the ground. If you try to kill them, you have to chew through the war surgeon’s Nobel prize winning medical skills, which is possible but expensive in terms of asset allocation (for me my Shadows) and actions (multiple attacks). A cheaper solution is to let the Aggressors double activate to move by not having moved anyone already sitting on the middle objective (denying the charge/assault), getting to stress one. Then you apply stress via a safe tool while moving into good positions (Protectors of the Forest, Druid’s attack spell which also slows, Ynyr’s charge and jump-to-scout etc), so they’re at stress two. Now you can charge them safely with any unit, pushing them off the objective and getting your unit on it. Since the Aggressors are now at their max stress of three, they must Rest before they can attack you. If you keep them engaged, they can’t Rest this round (outside of special stress reduction abilities of course, eg the Corporal). If you have control of the initiative, this might mean you can again disable them first action next round before they get a chance to do anything more this game. Many important units are vulnerable to being easily overstressed, notably Wargs, and this is a much cheaper way of disabling them instead of always trying to kill them.
Overstressing can also lead to enemies demoralising and running away, but I don’t rely on it because in my experience every enemy and their dog has read Drago the Anvil’s inspiring military propaganda. Also, fleeing for two activations is only relevant if those two activations were actually important for that unit at that time. If you demoralize a unit too early in the round and they just rally and come back on turn 4 or 5, then it may have been better to leave them on max stress where they could only Rest, instead of post-rally MOR-1, where they might charge you and win the game. Personally I think the best position to put the enemy is at max stress and engaged, so they can’t Rest, and you can guarantee they won’t bother you until at least next round. I once had a unit of Protectors demoralize three times in a game (link here) and still do all the work I wanted them to do – them running away so often was disappointing (if not funny) but not actually relevant to winning the game.
Initiative
Initiative control can be very important to determine unit positioning and stress. Going last in one round and then first in the next gives you two back to back activations with a stress reduction in between, which can be game winning. You can, for instance, charge an enemy, and then attack again next activation without getting countercharged or retaliated on. Once you push your opponent back via shove, you can then move into a better position with your second action. Better yet, you kill your enemy completely on the attack, and then get a free move action, letting you move twice this turn, often getting completely out of danger.
You gain the initiative at the end of a round if you have less points than your opponent, or if you are tied and don’t have initiative already. Sometimes I choose to not claim an objective just so that I will get the initiative in the next round. I have to highlight how foolishly risky this is (but fun!), your double activation has to be game changing otherwise the risk of falling behind on points is very high. In Sÿenann this double activation is usually with the dastardly Shadows of the Yew, who can reliably delete an enemy with each activation, so I personally often take this risk (because of fun), but it’s really not for everyone or every game (counterpoint: fun). On the other hand, going last is a huge advantage for objective control; you get to see how the points lie on the last activation of the round and take an objective back without any possible retaliation, which can often win a tight match. Personally, I prefer to go second in the first round, first in the second, and then win so hard in the midgame that my opponent having initiative in the final round doesn’t matter much.
“Points are cringe” – Unknown, circa 2022
One thing we haven’t discussed yet is extra activations which can offer you unique positioning opportunities. These come from special abilities like Strategos, Aide, Warg and Crow, etc and are incredibly valuable if you use them well – mostly to set up a fork, presenting two threats at once. If your opponent doesn’t also have extra activations to respond with, they will have to choose which threat to deal with and which one to take on the chin. You should make sure your threats are relevant and real – if your opponent deals with one, you execute the other with gusto. Your opponent should feel stuck as both options are bad. The problem with setting this up is with how telegraphed it is – if your opponent sees it coming, they can mitigate or even avoid the fork entirely. A good example of this kind of fork is double activating to move up Wargs into charge range, as well as scouting in Marauders near a vulnerable target. Now two enemies are in real danger – the enemy can run from the Wargs or set up for the countercharge, but then the Marauders are free to run amok and Snow Leopard Leap a fool. If they counter the Marauders, the Wargs do their thing with great aplomb. These kinds of forks are often easier in the late game when the enemy has already committed their units and have less backup, but if you leave it too late you may not have the time or stress to follow-up your threats.
So there are my thoughts on positioning and stress! If you thought I got anything wrong, don’t worry, I didn’t. Feel free to comment, debate, argue, meme, and otherwise give feedback here or on the Discord, I’d love to hear your discussion.
Next article coming up: How to play Sÿenann – Unit Breakdown!
In the meantime, check out the report from my first game at Interplanetario against Dead Flesh Scions here.
Thanks for reading!
Good article Jonno.